

Established in 1997


Blog Layout
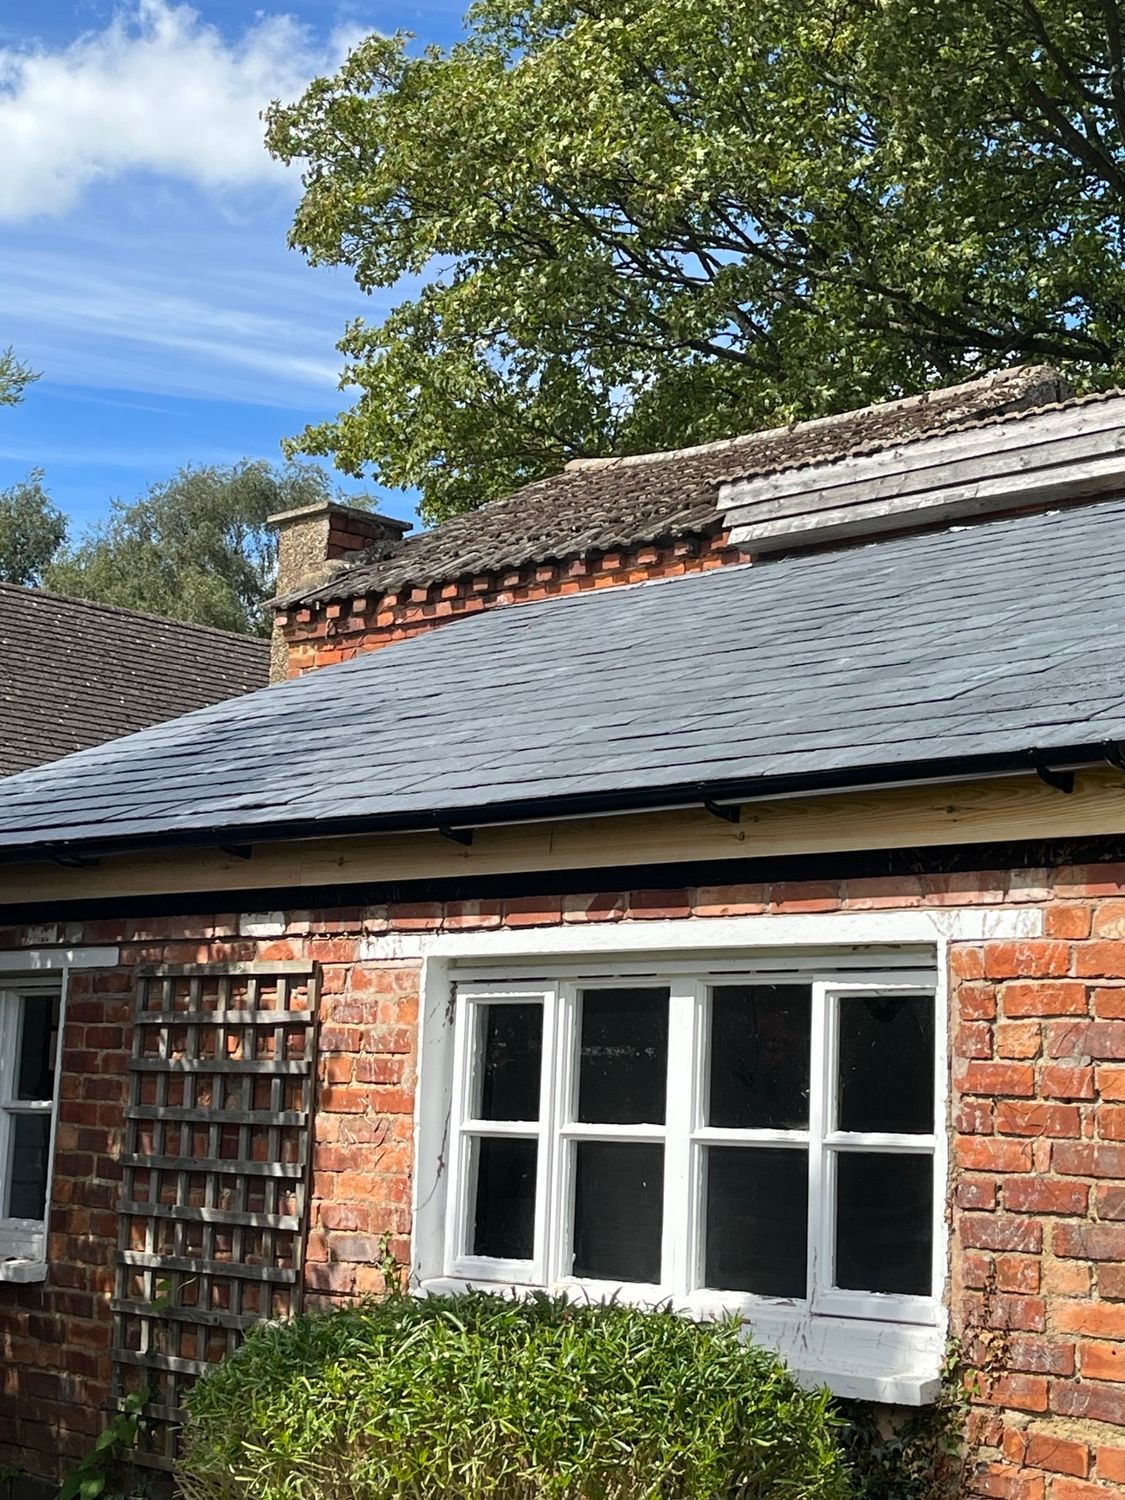
How to Identify and Fix Common Roof Leaks: A Homeowner's Guide
Roof leaks can be a homeowner's worst nightmare, leading to costly repairs and potential damage to your home’s structure and interior. Detecting and addressing these leaks promptly can save you a lot of trouble. Here’s a guide to help you identify and fix common roof leaks effectively.
Identifying Roof Leaks
1. Check for Visible Signs
Start by inspecting your roof from the ground. Look for any obvious signs of damage, such as missing shingles, cracked tiles, or sagging areas. These can be indicators of potential leaks. If you can safely access your roof, use a ladder to get a closer look at these areas.
2. Inspect the Roof’s Flashing
Flashing is the material used around chimneys, skylights, and vents to prevent water from seeping through. Check for any signs of rust, damage, or gaps in the flashing. Damaged or improperly installed flashing is a common cause of roof leaks.
3. Look for Stains and Discolouration
Inside your home, examine the ceilings and walls for water stains or discolouration. Stains that appear in a specific pattern or area can often indicate the location of the leak on your roof.
4. Check Attics and Roof Spaces
If you have an attic, inspect it for signs of leaks. Look for damp spots, mould growth, or water stains on the underside of the roof deck. This can provide clues about where the leak is originating from.
5. Perform a Water Test
On a dry day, use a garden hose to simulate rain. Start at the bottom edge of the roof and slowly work your way up, allowing water to flow over different sections. Have someone inside the house look for leaks while you do this. This method can help pinpoint the exact location of a leak.
Fixing Common Roof Leaks
1. Repair Missing or Damaged Shingles
If you find missing or damaged shingles, replace them promptly. Remove the damaged shingle, apply roofing adhesive or nails, and install a new shingle in its place. Ensure that the new shingle is properly aligned and sealed.
2. Seal Flashing Gaps
If you notice gaps or damage in the flashing, apply a roofing sealant to seal the gaps. For larger issues, you might need to replace the flashing entirely. Ensure that the new flashing is properly installed to prevent future leaks.
3. Fix Roof Ventilation Issues
Roof vents that are cracked or damaged can also lead to leaks. Replace any broken vent covers and check that the vents are properly sealed and secured.
4. Clear Clogged Gutters
Clogged gutters can cause water to back up and seep under the roof’s edge. Regularly clean your gutters to ensure that water flows freely. If you find any damage or blockages, address them immediately to prevent leaks.
5. Patch Small Holes and Cracks
Small holes or cracks in the roof can be patched with roofing cement or sealant. Clean the area around the hole, apply the sealant, and smooth it out. This can provide a temporary fix until a more permanent repair can be made.
When to Call a Professional
While DIY repairs can address minor issues, some roof leaks may require professional intervention. If you’re unsure about the extent of the damage or if the repairs are beyond your skill level, it’s best to consult a roofing professional. They have the experience and tools to assess the situation accurately and perform repairs that ensure long-term protection for your home.
Preventive Measures
To reduce the risk of future leaks, consider the following preventive measures:
- Regular Roof Inspections: Schedule regular roof inspections to catch potential issues before they become major problems.
- Gutter Maintenance: Keep gutters and downspouts clean to prevent water from backing up and damaging your roof.
- Tree Trimming: Trim overhanging branches that could potentially damage your roof or drop debris into your gutters.
Conclusion
Identifying and fixing roof leaks is crucial for maintaining the integrity of your home. By following these steps, you can address common roof leaks effectively and prevent further damage. If you encounter persistent issues or need professional assistance, don’t hesitate to contact a roofing expert. Ensuring your roof remains in top condition will protect your home and provide you with peace of mind.
Home maintenance is never anyone’s favourite way to spend money—but delaying essential repairs like chimney and gutter work can lead to much bigger costs down the track. The good news? There are ways to keep things affordable without sacrificing quality. Here at Surefix Roofing, we help Northampton homeowners save on chimney and gutter repairs by combining expert knowledge, efficient equipment, and a no-nonsense approach to pricing. Smart Ways to Cut Costs on Repairs (Without Cutting Corners) ✅ Early Detection = Less Damage Small issues—like cracked chimney pointing or a minor gutter blockage—can snowball into major structural damage if ignored. Spotting and addressing these early can save hundreds, if not thousands, in future repairs. ✅ Use the Right Equipment We use a 20-metre cherry picker access platform, which eliminates the need for scaffolding in many cases. That cuts down setup time and labour costs, and lets us reach tricky spots (like chimneys and high gutters) with ease. ✅ Bundle Repairs Where Possible Need both your gutters and chimney looked at? Tackle them in one go. Bundling repairs into a single visit saves on call-out fees and streamlines labour costs. ✅ Choose an Experienced Local Roofer We’ve worked on all kinds of homes across Northampton, and we know what to look for. Our experienced team gets the job done right the first time—meaning you’re not stuck paying for patch-ups or follow-up fixes. The Surefix Advantage With Surefix Roofing, you’re not just paying for a repair—you’re investing in peace of mind. Our cherry picker allows us to work safely and efficiently at height, reducing unnecessary expenses while keeping standards high. Whether it’s chimney repointing, gutter realignment, or general roof maintenance, we’ll give you honest advice, fair pricing, and high-quality results. Ready to Fix It for Less? If you’ve been putting off chimney or gutter repairs because of the cost, let’s chat. We’ll take a look, give you a clear quote, and help you fix the issue before it becomes a bigger one. Contact Surefix Roofing today — smart repairs, done right.
Carrying out roof, chimney, or gutter repairs at height often comes with challenges—safety concerns, accessibility issues, and time-consuming setups can quickly make the job harder than it needs to be. That’s where using a cherry picker access platform makes a world of difference. At Surefix Roofing, we use a 20-metre cherry picker to reach those tricky spots quickly and safely, without the need for scaffolding or complicated setups. Why Choose a Cherry Picker for High Repairs? ✔️ Faster Access : Forget the hours wasted assembling scaffolding. Our cherry picker allows us to get to work almost immediately, helping you save time (and money). ✔️ Improved Safety : Working from a secure, enclosed platform means fewer risks compared to using ladders or makeshift access solutions. Safety is always a top priority on every job. ✔️ Versatile Reach : Whether it’s a loose tile on a three-storey home, chimney flashing repairs, or clearing blocked gutters, our cherry picker can handle it. With a 20m vertical reach, it’s ideal for most Northampton properties. ✔️ Cost-Effective Solution : By cutting down setup time and reducing the need for scaffolding, you’re not just saving time—you’re also reducing labour and equipment costs. Common Repairs We Handle at Height Chimney repointing and capping Roof tile and flashing repairs Gutter cleaning and replacement Leak investigations and patchwork No Fuss, No Scaffolding — Just Results The cherry picker isn’t just convenient—it’s a game-changer. It allows our team to diagnose and complete repairs faster, with minimal disruption to your home or property. And because we can access more areas from a single setup point, the job gets done quicker and cleaner. Need Repairs at Height? Call Surefix Roofing If your roof, chimney, or gutters need attention but you’ve been putting it off due to access concerns, we’ve got the solution. With our 20m cherry picker, we’re equipped to handle high-reach repairs with ease and safety. Contact Surefix Roofing today for a free quote or inspection—let’s get your home sorted, the smarter way.
Your roof is one of the most important components of your home, protecting it from the elements and ensuring your property remains safe and structurally sound. But not all roofs last the same amount of time—different materials come with varying lifespans, maintenance needs, and costs. If you’re planning a roof replacement or just want to understand how long your current roof will last, here’s what you need to know. Lifespan of Common Roofing Materials Asphalt Shingles (15-30 Years) A popular choice due to affordability and ease of installation, asphalt shingles can last between 15 and 30 years with proper maintenance. However, they may wear out faster in extreme weather conditions. Slate Roofing (50-100+ Years) Slate is one of the most durable roofing materials available, often lasting over a century. While it offers timeless beauty and exceptional durability, it comes with a higher cost and requires a sturdy roof structure to support its weight. Clay and Concrete Tiles (50-70 Years) Ideal for traditional and Mediterranean-style homes, clay and concrete tiles are extremely durable and resistant to fire, rot, and pests. With proper maintenance, they can last between 50 and 70 years. Metal Roofing (40-70 Years) Metal roofs are becoming increasingly popular due to their longevity, energy efficiency, and low maintenance needs. A properly installed metal roof can last anywhere from 40 to 70 years, making it a great long-term investment. EPDM Rubber Roofing (25-50 Years) EPDM (Ethylene Propylene Diene Monomer) rubber roofing is commonly used for flat roofs due to its flexibility and weather resistance. When properly installed and maintained, it can last up to 50 years. Factors That Affect Roof Longevity Even with a long-lasting roofing material, several factors can impact its lifespan, including: Weather Conditions – Harsh weather, such as storms, snow, and high winds, can cause premature wear and tear. Maintenance and Repairs – Regular inspections and timely repairs can significantly extend the life of your roof. Installation Quality – Poor installation can lead to leaks and structural issues, reducing a roof’s lifespan. Need Roof Repairs or a New Roof? We’ve Got You Covered! No matter what type of roofing material your home has, maintenance and timely repairs are essential to ensure longevity. At Surefix Roofing, we provide expert roofing services, from minor repairs to full roof replacements. Our 20-metre access platform allows us to safely and efficiently carry out work on most properties, whether it’s fixing a minor leak, replacing damaged shingles, or installing a brand-new roof. Book Your Free Roof Inspection Today If you're unsure about the condition of your roof or considering an upgrade, Surefix Roofing is here to help. Contact us today for expert advice and a free consultation!
Skylights can be a fantastic addition to any home, bringing in natural light, improving ventilation, and even enhancing the aesthetic appeal of your space. However, before installing one, it's essential to weigh the benefits and potential drawbacks to ensure it's the right choice for your Northampton home. The Benefits of Installing Skylights Increased Natural Light – Skylights brighten up rooms that lack sufficient windows, making spaces feel larger and more inviting. This can be particularly beneficial in Northampton homes with limited wall space for traditional windows. Improved Energy Efficiency – When strategically placed, skylights can reduce the need for artificial lighting and even help with passive solar heating in colder months, potentially lowering energy bills. Better Ventilation – Ventilated skylights can improve airflow, reducing humidity and helping to prevent mould growth, especially in kitchens and bathrooms. Enhanced Aesthetic Appeal – Skylights add a modern touch to your home’s interior while increasing its overall value by making living spaces more attractive and comfortable. The Potential Drawbacks of Skylights Heat Gain and Loss – Poorly placed or low-quality skylights can make a home too hot in summer and too cold in winter. Choosing energy-efficient glazing and proper installation is key to minimising these effects. Potential for Leaks – If not installed correctly, skylights can become a weak point in your roof, leading to water leaks. That’s why it’s crucial to work with experienced roofing professionals. Upfront Costs and Maintenance – High-quality skylights require an initial investment, and over time, they may need maintenance to keep them in good condition, including resealing and occasional cleaning to prevent dirt buildup. Professional Skylight Installation Matters If you're considering adding a skylight to your home, expert installation is crucial. At Surefix Roofing, we ensure that every skylight is installed with precision, using high-quality materials to prevent leaks and maximise energy efficiency. We also have a 20-metre access platform, allowing us to handle skylight installations and roof repairs on most properties safely and efficiently. Whether you need a new skylight or repairs to an existing one, our team is here to help. Thinking About Installing a Skylight? Let’s Talk! Skylights can be a great investment, but they require careful planning and professional installation to avoid common pitfalls. If you're ready to brighten up your home with a skylight, contact Surefix Roofing today for expert advice and a free consultation.
Roof damage can happen unexpectedly, whether due to a severe storm, fallen tree branches, or general wear and tear. When your roof is compromised, acting quickly is essential to prevent further damage to your home. Knowing what steps to take in an emergency can save you time, money, and stress. Common Causes of Emergency Roof Damage Storm Damage – High winds, heavy rain, and hail can loosen shingles, damage flashing, or cause leaks. Fallen Debris – Tree branches and other debris can puncture roofing materials, leading to immediate water ingress. Structural Weakness – Older roofs may develop sudden leaks due to years of wear and tear. Gutter Blockages – Overflowing or broken gutters can lead to water pooling on your roof, increasing the risk of leaks. What to Do If Your Roof Is Damaged Assess the Situation Safely If you notice visible damage, such as missing tiles or water leaks, inspect the area from a safe distance. Avoid climbing onto the roof yourself, as it may be unstable. Minimise Interior Damage Place buckets or towels under leaks to catch water and move valuables away from the affected area. Cover Exposed Areas If safe to do so, use a tarpaulin to cover any holes temporarily and prevent further water damage. Call a Professional Roofing Contractor Contact a trusted roofing company as soon as possible. Quick action can prevent the damage from worsening and reduce repair costs. Surefix Roofing: Your Trusted Partner for Emergency Roof Repairs At Surefix Roofing, we understand that roofing emergencies require immediate attention. Our team is equipped to handle urgent repairs efficiently, restoring the safety of your home. Thanks to our 20-metre cherry picker access platform, we can quickly reach high or difficult areas without needing scaffolding, allowing for faster, safer repairs. If you’re facing a roofing emergency in Northampton, don’t delay—call Surefix Roofing today for expert assistance and peace of mind.
When it comes to protecting your roof from leaks and weather damage, lead flashing plays a crucial role. Despite being a small component of your roofing system, its importance should not be overlooked. Without proper flashing, water can seep into vulnerable areas, leading to costly repairs and structural issues. What Is Lead Flashing? Lead flashing is a durable and weather-resistant material installed around roof joints, chimneys, vents, and other openings to prevent water from penetrating your home. Due to its flexibility and longevity, lead remains one of the best choices for roofing protection. Why Is Lead Flashing Important? Prevents Leaks – Flashing seals the gaps between different roof sections, ensuring rainwater is directed away from vulnerable areas. Enhances Roof Longevity – By stopping water infiltration, flashing helps prevent rot, mould, and structural deterioration. Withstands Harsh Weather – Lead is incredibly durable, capable of handling temperature fluctuations, heavy rainfall, and strong winds. Requires Minimal Maintenance – Compared to other materials, lead flashing lasts for decades with minimal upkeep. Signs Your Lead Flashing Needs Repair or Replacement Cracks or splits in the lead Loose or missing flashing around chimneys and vents Water stains on ceilings or walls Mould or dampness in your attic If you notice any of these issues, addressing them promptly can save you from more expensive repairs down the line. Get Professional Lead Flashing Repairs with Surefix Roofing At Surefix Roofing, we specialise in lead flashing installation and repairs, ensuring your home stays protected from water damage. Using our 20-metre cherry picker access platform, we can safely reach roof areas that are difficult to access, allowing us to perform high-quality repairs on chimneys, gutters, and flashing without the need for scaffolding. Don't wait until a small leak turns into a major problem. Contact Surefix Roofing today for expert lead flashing services in Northampton!
After a storm, your roof has taken the brunt of the harsh weather conditions, and it’s crucial to assess its condition to ensure your home remains protected. Strong winds, heavy rain, hail, and even snow can cause significant damage to your roof, potentially leading to leaks, structural issues, or even complete roof failure if left unchecked. By taking proactive steps to maintain your roof, you can prevent costly repairs and safeguard your home from future damage. In this guide, we’ll walk you through the essential steps for maintaining your roof after a storm and how Surefix Roofing can help you with expert repairs and inspections. Step 1: Stay Safe – Assess From the Ground Before you rush up to inspect your roof, your safety should be your number one priority. Storms often leave behind slippery conditions and debris, which can make climbing dangerous. Begin your assessment from the ground by looking for the following signs of damage: Missing Shingles or Tiles : Strong winds can tear off shingles or tiles, leaving parts of your roof exposed. Debris : Fallen branches, tree limbs, or other debris can damage your roof, gutters, and fascia. Gutter Blockages : Storms can cause gutters to clog with leaves, twigs, and dirt, leading to improper water drainage. Visible Dents or Cracks : Look for dents or cracks on your roof that may have been caused by hail or falling debris. Step 2: Inspect the Interior of Your Home Once you've checked the exterior, move inside your home to inspect the ceilings, attic, and walls for any signs of water damage. Look for: Leaks or Water Stains : Dark spots or water dripping down your walls or ceiling could indicate a roof leak. Musty Odours : A persistent damp smell may point to hidden moisture, potentially causing mould growth. Structural Damage : If you notice sagging or unusual marks on your ceiling, it could be a sign of significant water damage. If you discover any of these issues, it’s best to call a professional roofing company immediately for a more detailed inspection. Step 3: Clear Debris from the Roof and Gutters After a storm, your roof may be covered in branches, leaves, and other debris that can clog gutters and drainage systems. Clogged gutters prevent water from flowing properly off the roof, leading to potential leaks or water damage. Here’s what to do: Remove Debris : Carefully remove debris from the roof’s surface using a broom or soft brush. Be sure to avoid walking on the roof if it's wet or slippery. Clear the Gutters : Use a ladder to clear out any debris from the gutters to ensure proper water flow. Clogged gutters can cause water to pool on the roof, leading to leaks or even structural damage over time. If you're unsure or uncomfortable with climbing ladders or working on the roof, call a professional like Surefix Roofing to handle the job safely and efficiently. Step 4: Check for Signs of Roof Damage After removing debris, inspect your roof more closely for signs of damage. Keep an eye out for: Cracked or Missing Shingles : Strong winds can dislodge or crack shingles. A missing or damaged shingle leaves your roof vulnerable to leaks. Damage to Flashing : Flashing is used around chimneys, vents, and skylights to prevent water from seeping in. Storms can loosen or damage flashing, creating leaks. Hail Damage : If hail was part of the storm, check for signs of denting or pitting on shingles, which can compromise their waterproofing ability. Step 5: Schedule a Professional Roof Inspection Even if your roof looks intact from the outside, hidden damage can occur. The safest and most reliable way to ensure your roof is in good condition is by scheduling a professional roof inspection. A roofing expert can: Thoroughly inspect the roof : Professionals can look for hidden damage to shingles, flashing, and underlayment that you might miss. Check for leaks and signs of water infiltration : They can test your roof's integrity and repair any leaks before they cause more significant damage. Provide long-term solutions : A roofing expert can suggest the best course of action for maintaining your roof and prolonging its lifespan. Step 6: Carry Out Necessary Repairs If your roof inspection reveals any issues, prompt repairs are essential to avoid further damage. Common repairs after a storm may include: Replacing missing or damaged shingles : Ensure your roof is fully covered to prevent leaks. Sealing gaps and cracks : Ensure all gaps, including around vents and chimneys, are sealed properly to prevent water infiltration. Gutter and downspout repairs : Fix any damaged gutters to maintain proper drainage and prevent future damage to the roof. How Surefix Roofing Can Help At Surefix Roofing, we understand the importance of a well-maintained roof, especially after a storm. Our team of roofing experts is here to help you assess and repair any storm damage, ensuring your roof continues to protect your home. We also offer emergency repair services, so if you notice damage after a storm, don’t wait—contact us immediately. Plus, with our 20-metre Cherry Picker access platform, we can safely and efficiently reach high or difficult-to-access roofs for repairs, including gutter and chimney work. If you’re unsure about the condition of your roof after a storm, contact Surefix Roofing today for a professional inspection and a free quote. We’ll help you maintain a safe, secure home, no matter what the weather brings.
When it comes to roofing, choosing the right style for your home is crucial. Your roof not only plays a significant role in protecting your home from the elements but also impacts the overall aesthetic and functionality of your property. Two of the most common types of roofs are flat and pitched roofs, each offering its own set of advantages and considerations. But which one is right for your Northampton home? In this blog, we’ll explore the differences between flat roofs and pitched roofs to help you make an informed decision based on your home's needs, budget, and design preferences. Flat Roofs: Modern, Sleek, and Space-Saving Flat roofs are a popular choice for modern homes, commercial buildings, and extensions. As the name suggests, flat roofs are nearly level, with only a slight pitch to allow for drainage. Here are some of the key advantages of flat roofs: 1. Cost-Effective Flat roofs are often more affordable to install compared to pitched roofs. With fewer materials and simpler construction, flat roofs can be a more budget-friendly option, especially for homeowners looking to save on initial costs. 2. Space-Saving Flat roofs offer additional usable space, which can be ideal for a variety of purposes. Whether you're interested in creating a rooftop garden, installing solar panels, or even adding an outdoor living area, flat roofs offer the opportunity to make the most of your roof space. 3. Easy to Maintain Flat roofs generally require less maintenance than pitched roofs. With fewer angles and no complicated sloped surfaces, cleaning and inspecting a flat roof can be easier. However, flat roofs can accumulate debris, so regular cleaning and inspections are essential to prevent blockages in the drainage system. 4. Ideal for Extensions and Modern Builds Flat roofs are commonly used for extensions, garage conversions, and modern homes due to their sleek, contemporary look. They also offer more flexibility in design, as they can be integrated seamlessly with the rest of the property. Considerations for Flat Roofs: Water Drainage : Flat roofs need proper drainage systems to prevent water pooling, which can lead to leaks and damage over time. Longevity : Flat roofs, especially those made from certain materials like bitumen or EPDM, may require more frequent repairs and replacements compared to pitched roofs. Insulation : Adequate insulation is essential for flat roofs to prevent heat loss and maintain energy efficiency in your home. Pitched Roofs: Traditional, Durable, and Versatile Pitched roofs have been a staple of home construction for centuries and remain a popular choice due to their proven durability and classic look. Pitched roofs are characterised by two sloping sides that meet at the top to form a peak. Here are the main advantages of pitched roofs: 1. Durability and Longevity Pitched roofs are known for their durability and can last for many decades with proper maintenance. The slope of a pitched roof allows rain and snow to naturally slide off, reducing the likelihood of water damage and extending the lifespan of the roof. Materials such as slate, tile, or metal are often used for pitched roofs, further enhancing their longevity. 2. Better Drainage and Weather Resistance One of the biggest benefits of pitched roofs is their natural ability to shed water, snow, and debris. The slope ensures that rainwater and melting snow flow off the roof efficiently, reducing the risk of leaks and water damage. Pitched roofs are also more resistant to harsh weather conditions, such as heavy winds or snowfall. 3. Aesthetic Appeal Pitched roofs are often associated with traditional, charming designs and can enhance the kerb appeal of your home. The distinctive look of a pitched roof can add character and visual interest to your property, making it stand out in a neighbourhood. Pitched roofs also allow for more variety in terms of materials and styles. 4. Increased Attic Space One of the advantages of pitched roofs is the additional attic space they create. If you’re looking for extra storage or the possibility to convert your attic into a living space, a pitched roof provides more room for these types of projects. This can be a valuable addition to your home, particularly if you're looking to expand without extending the footprint of your property. Considerations for Pitched Roofs: Higher Installation Costs : Pitched roofs typically cost more to install due to the additional materials and more complex construction process. Maintenance Needs : While pitched roofs tend to require fewer repairs, they may still need occasional attention, such as cleaning gutters and checking for damage to the roofing materials. Design Limitations : Pitched roofs may not be suitable for all architectural styles, particularly modern or minimalist homes. The aesthetic of the roof needs to match the design of the rest of the property. Which Roof Is Right for You? Choosing between a flat roof and a pitched roof depends on several factors, including the style of your home, your budget, and the long-term maintenance you're willing to invest in. Here’s a quick guide to help you make your decision: Flat Roofs : Best for modern homes, extensions, or homeowners looking for additional space (such as a rooftop garden). Flat roofs are cost-effective, sleek, and offer versatility. Pitched Roofs : Ideal for traditional homes or those looking for a durable, weather-resistant, and aesthetically pleasing roof that adds value to your property. Pitched roofs are long-lasting and provide additional attic space. How Surefix Roofing Can Help At Surefix Roofing, we specialise in both flat and pitched roofs, providing expert advice, installation, and repair services to homeowners throughout Northampton. We can help you decide which roofing option best suits your home and budget. Additionally, with our 20-metre Cherry Picker access platform, we can easily reach and service roofs of all types and heights, whether you're in need of installation, maintenance, or repairs on a flat or pitched roof. If you're ready to explore your roofing options or need assistance with roof repairs, contact Surefix Roofing today for a consultation. Let our team guide you to the best roofing solution for your Northampton home.
When it comes to keeping your home comfortable and energy-efficient, many homeowners overlook the crucial role that roof insulation plays. The condition of your roof and its insulation can significantly affect your heating and cooling costs, especially during the cold Northampton winters and the warmer summer months. Why Roof Insulation Matters Roof insulation helps regulate the temperature inside your home by preventing heat from escaping during the winter and keeping it cool during the summer. With effective insulation, your home can retain warmth in the colder months, reducing the need for excessive heating. In the summer, proper insulation prevents heat from entering the house, helping your air conditioning system work more efficiently. Without proper insulation, your home can suffer from temperature fluctuations that lead to increased energy consumption. The result? Higher energy bills, discomfort, and the risk of moisture problems like condensation and mould. How Roof Insulation Improves Energy Efficiency Temperature Regulation: Proper insulation acts as a barrier to temperature changes. It ensures your home stays warmer in the winter and cooler in the summer, providing year-round comfort. Lower Energy Bills : By reducing the need for heating and cooling systems to work overtime, insulation directly contributes to lower energy bills. You’ll notice a significant difference, especially in homes with older roofing systems. Enhanced Home Comfort : Effective insulation prevents drafts and cold spots within your home, creating a more comfortable living environment throughout the year. Noise Reduction : Insulation not only keeps temperatures stable but can also reduce outside noise, making your home quieter and more peaceful. Signs You Need to Upgrade Your Roof Insulation If your roof insulation is outdated or ineffective, you may start noticing a few signs around your home, including: High energy bills despite consistent thermostat settings. Uncomfortably hot or cold rooms, particularly in the attic or upper levels. Noticeable drafts or cold spots in certain areas. Dampness or condensation in the attic, which can lead to mould growth. The Right Type of Roof Insulation for Your Home When considering roof insulation, there are several types to choose from, including: Fibreglass Batts : A common and affordable option that provides effective thermal protection. Spray Foam Insulation : Offers a high level of energy efficiency by expanding to fill gaps, creating an airtight seal. Blown-In Insulation : Ideal for existing homes, this type of insulation is blown into spaces using a machine and is particularly effective for hard-to-reach areas. How Surefix Roofing Can Help At Surefix Roofing, we understand the importance of roof insulation in maintaining a comfortable and energy-efficient home. Our team of experts can assess the insulation in your existing roof and recommend the best solution for your property. We offer professional installation and upgrade services to ensure your home is properly insulated, reducing your energy consumption and improving your overall comfort. Additionally, our 20-metre Cherry Picker access platform allows us to reach most properties with ease, ensuring safe and efficient roof insulation installation or maintenance, even in challenging locations. Whether you're installing new insulation or replacing outdated materials, Surefix Roofing is here to help you achieve optimal energy efficiency. Don't Let Poor Insulation Drain Your Energy If you’re ready to improve your home’s energy efficiency with quality roof insulation, contact Surefix Roofing today for a consultation. Our expert team is ready to help you find the best solution for your home, reduce your energy bills, and enhance your comfort all year long.
When it comes to keeping your home comfortable and energy-efficient, many homeowners overlook the crucial role that roof insulation plays. The condition of your roof and its insulation can significantly affect your heating and cooling costs, especially during the cold Northampton winters and the warmer summer months. Why Roof Insulation Matters Roof insulation helps regulate the temperature inside your home by preventing heat from escaping during the winter and keeping it cool during the summer. With effective insulation, your home can retain warmth in the colder months, reducing the need for excessive heating. In the summer, proper insulation prevents heat from entering the house, helping your air conditioning system work more efficiently. Without proper insulation, your home can suffer from temperature fluctuations that lead to increased energy consumption. The result? Higher energy bills, discomfort, and the risk of moisture problems like condensation and mould. How Roof Insulation Improves Energy Efficiency Temperature Regulation: Proper insulation acts as a barrier to temperature changes. It ensures your home stays warmer in the winter and cooler in the summer, providing year-round comfort. Lower Energy Bills : By reducing the need for heating and cooling systems to work overtime, insulation directly contributes to lower energy bills. You’ll notice a significant difference, especially in homes with older roofing systems. Enhanced Home Comfort : Effective insulation prevents drafts and cold spots within your home, creating a more comfortable living environment throughout the year. Noise Reduction : Insulation not only keeps temperatures stable but can also reduce outside noise, making your home quieter and more peaceful. Signs You Need to Upgrade Your Roof Insulation If your roof insulation is outdated or ineffective, you may start noticing a few signs around your home, including: High energy bills despite consistent thermostat settings. Uncomfortably hot or cold rooms, particularly in the attic or upper levels. Noticeable drafts or cold spots in certain areas. Dampness or condensation in the attic, which can lead to mould growth. The Right Type of Roof Insulation for Your Home When considering roof insulation, there are several types to choose from, including: Fibreglass Batts : A common and affordable option that provides effective thermal protection. Spray Foam Insulation : Offers a high level of energy efficiency by expanding to fill gaps, creating an airtight seal. Blown-In Insulation : Ideal for existing homes, this type of insulation is blown into spaces using a machine and is particularly effective for hard-to-reach areas. How Surefix Roofing Can Help At Surefix Roofing, we understand the importance of roof insulation in maintaining a comfortable and energy-efficient home. Our team of experts can assess the insulation in your existing roof and recommend the best solution for your property. We offer professional installation and upgrade services to ensure your home is properly insulated, reducing your energy consumption and improving your overall comfort. Additionally, our 20-metre Cherry Picker access platform allows us to reach most properties with ease, ensuring safe and efficient roof insulation installation or maintenance, even in challenging locations. Whether you're installing new insulation or replacing outdated materials, Surefix Roofing is here to help you achieve optimal energy efficiency. Don't Let Poor Insulation Drain Your Energy If you’re ready to improve your home’s energy efficiency with quality roof insulation, contact Surefix Roofing today for a consultation. Our expert team is ready to help you find the best solution for your home, reduce your energy bills, and enhance your comfort all year long.

© 2025. The content on this website is owned by us and our licensors. Do not copy any content (including images) without our consent.